VUZE Setup Guide
Setup a Windscribe in your VUZE torrent client.
SOCKS5 servers are being phased out and will no longer be offered by Windscribe. See Better Alternative.
Caution - Using Windscribe for the explicit purpose of copyright avoidance or infringement is prohibited. View ToS.
Stap 1
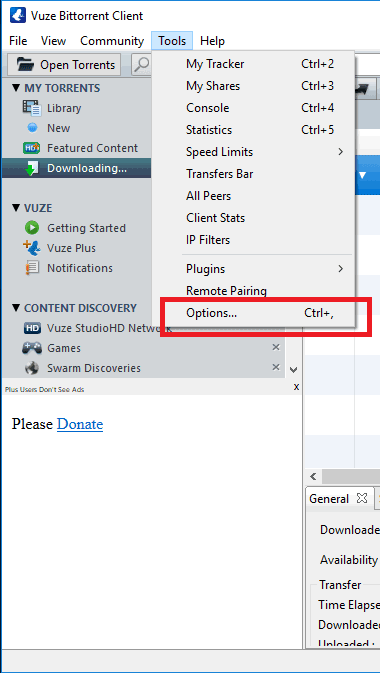
In VUZE, click on Tools and then Options.
Stap 2
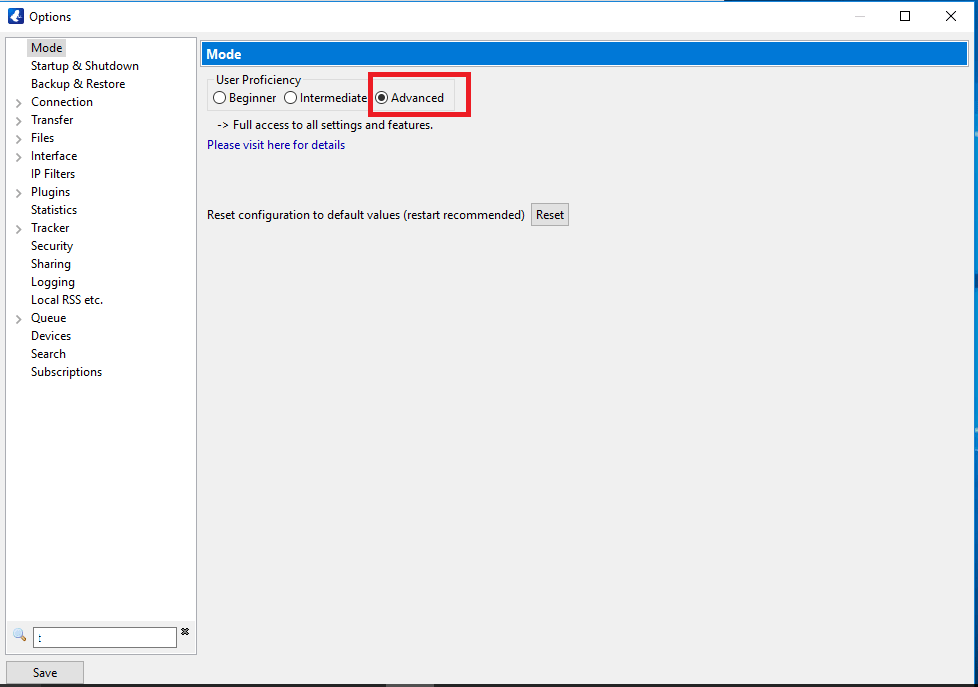
In the Mode -> User Proficiency section, click on the radio button next to Advanced.
Stap 3
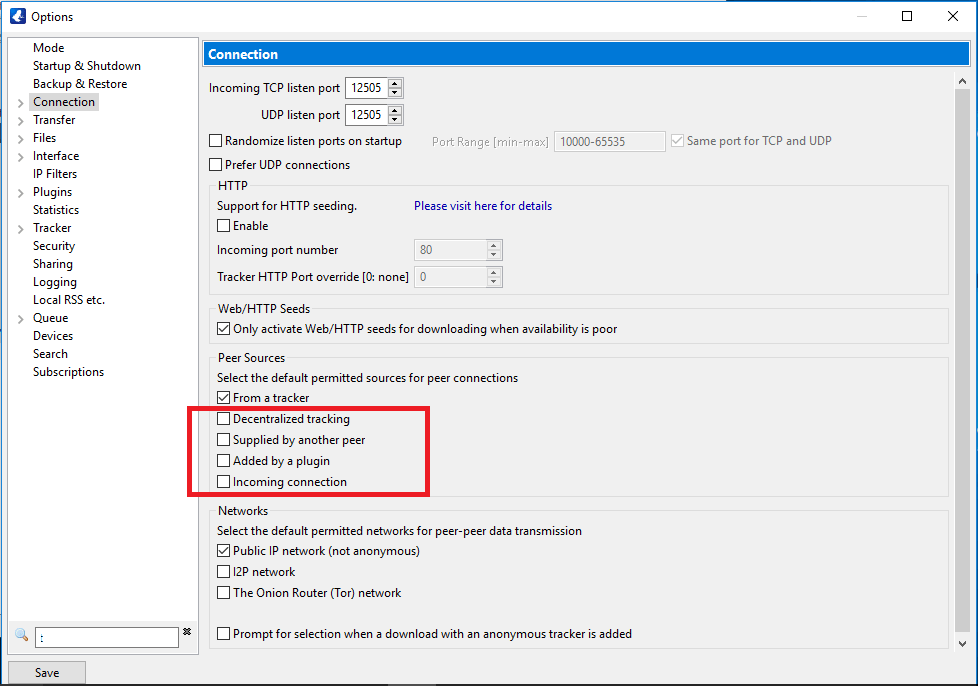
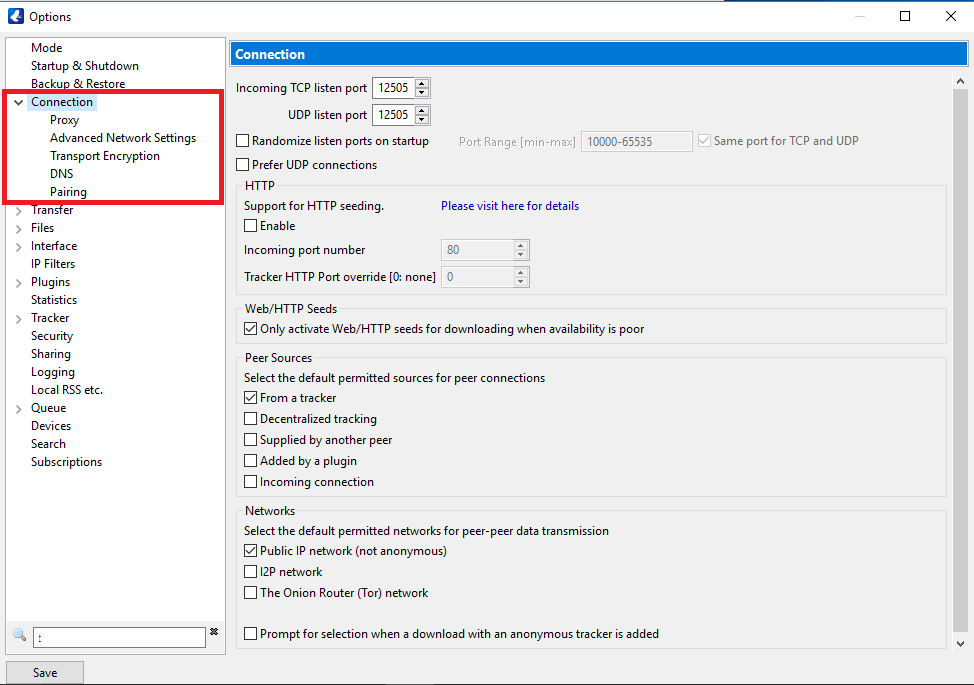
Click on Connection. If you are planning to use Socks5 proxy for privacy purposes, from section "Peer Sources" please uncheck options below: "Decentralized tracking", "Supplied by another peer", "added by a plugin" , "Incoming connection" . The only option that remains checked should be "From a tracker".
This will disable features that would otherwise allow your public IP address to leak and for other peers to connect directly to you. Please note this setting may reduce the number of peers and seeders and reduce your torrent speed.
Stap 4
Double click on Connection section to reveal more options.
Stap 5
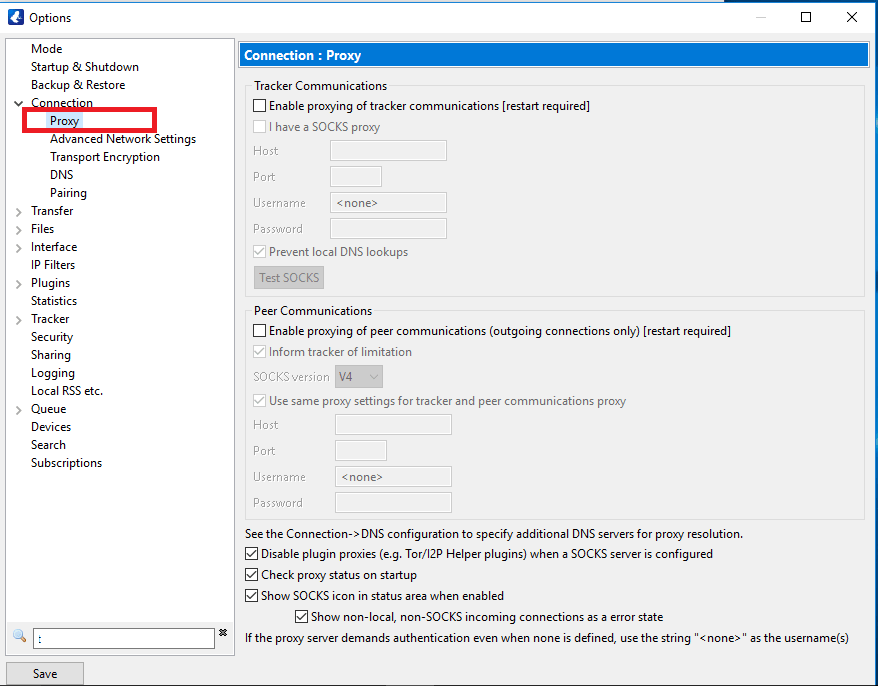
Click on Proxy.
Stap 6
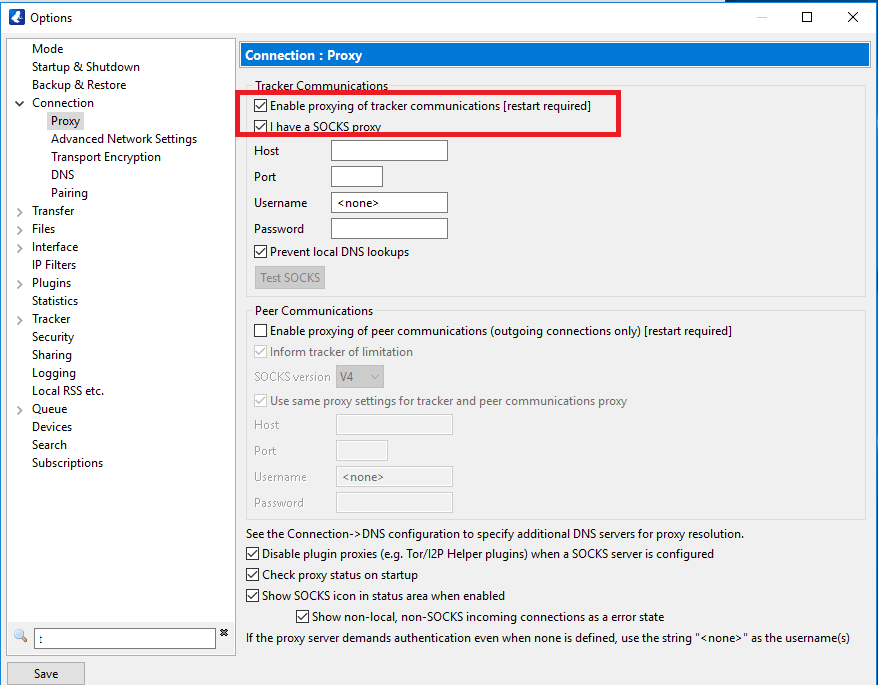
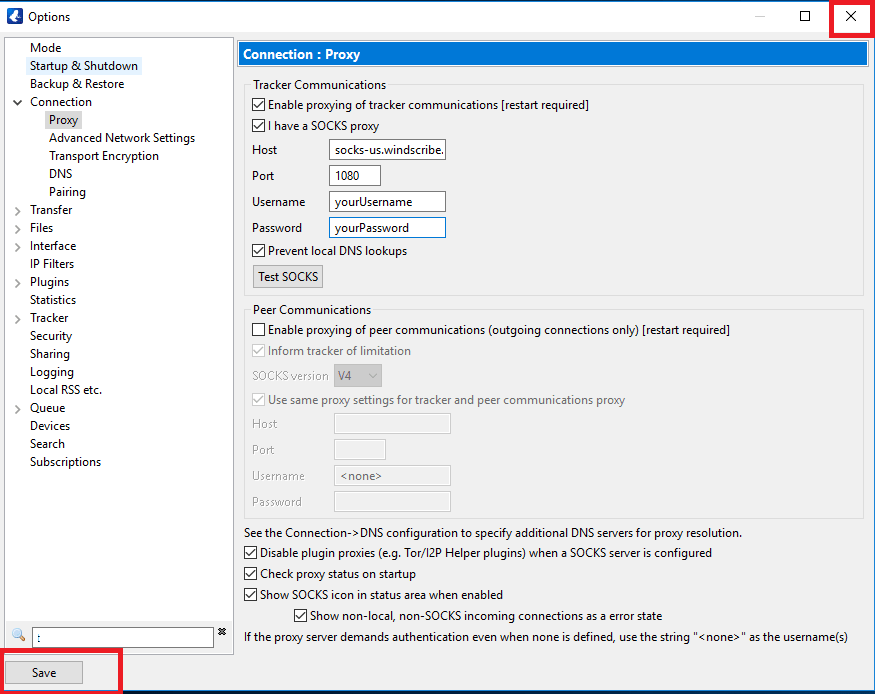
In the Tracker Communications section, check mark the following: "Enable proxying of tracker communications [restart required]" and "I have a SOCKS proxy".
Stap 7
Get SOCKS profile and credentials (requires a pro account).
Stap 8
Input Host Server address, Port number, Username and Password as provided on the SOCKS5 Profile Generator page. Then click on Test SOCKS.

Stap 9
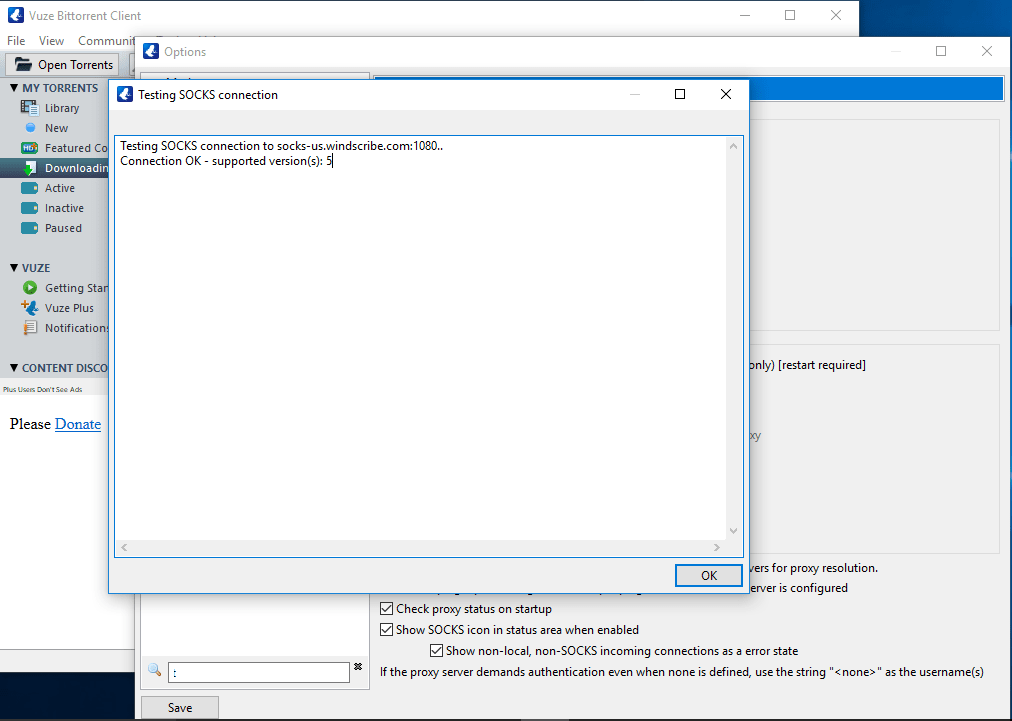
A new window "Testing SOCKS connection" will appear, you should see the following result: Connection OK – supported version(s): 5.
Stap 10
After test successful, press Save, then press "X" to close the options window.
Stap 11
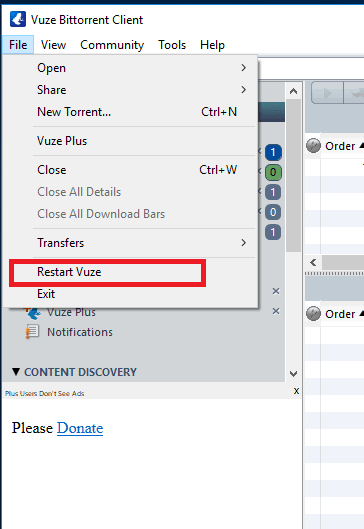
Click on File -> Restart Vuze to restart the application.
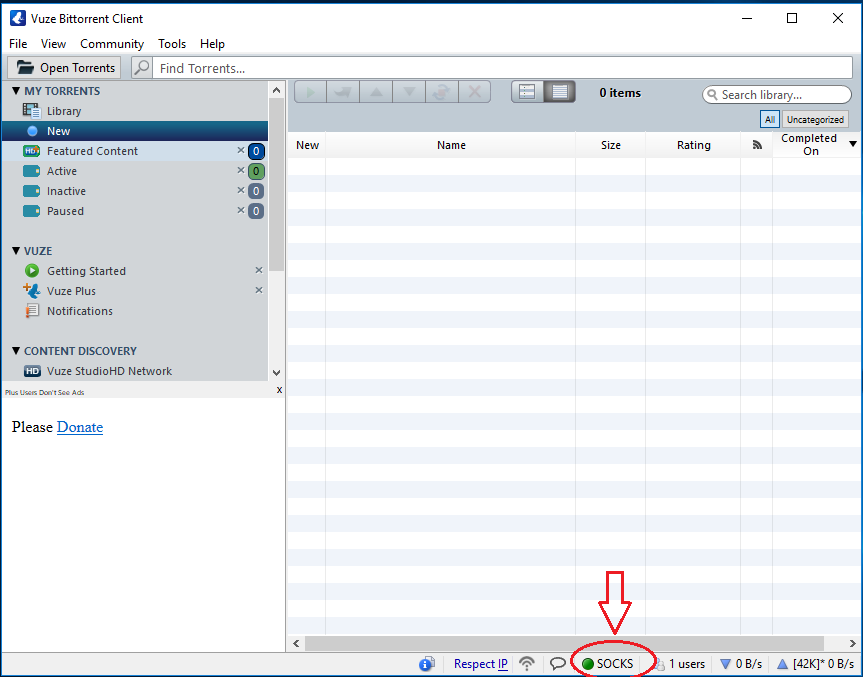
Stap 12
Once application restarts, a green indicator should appear in the SOCKS status bar, this means that SOCKS5 is working successfully.