Getting started with Windscribe in your Firefox browser is quick and simple. We recommend checking out the video version of this guide here to see how it's done:
How to set up Windscribe on Firefox
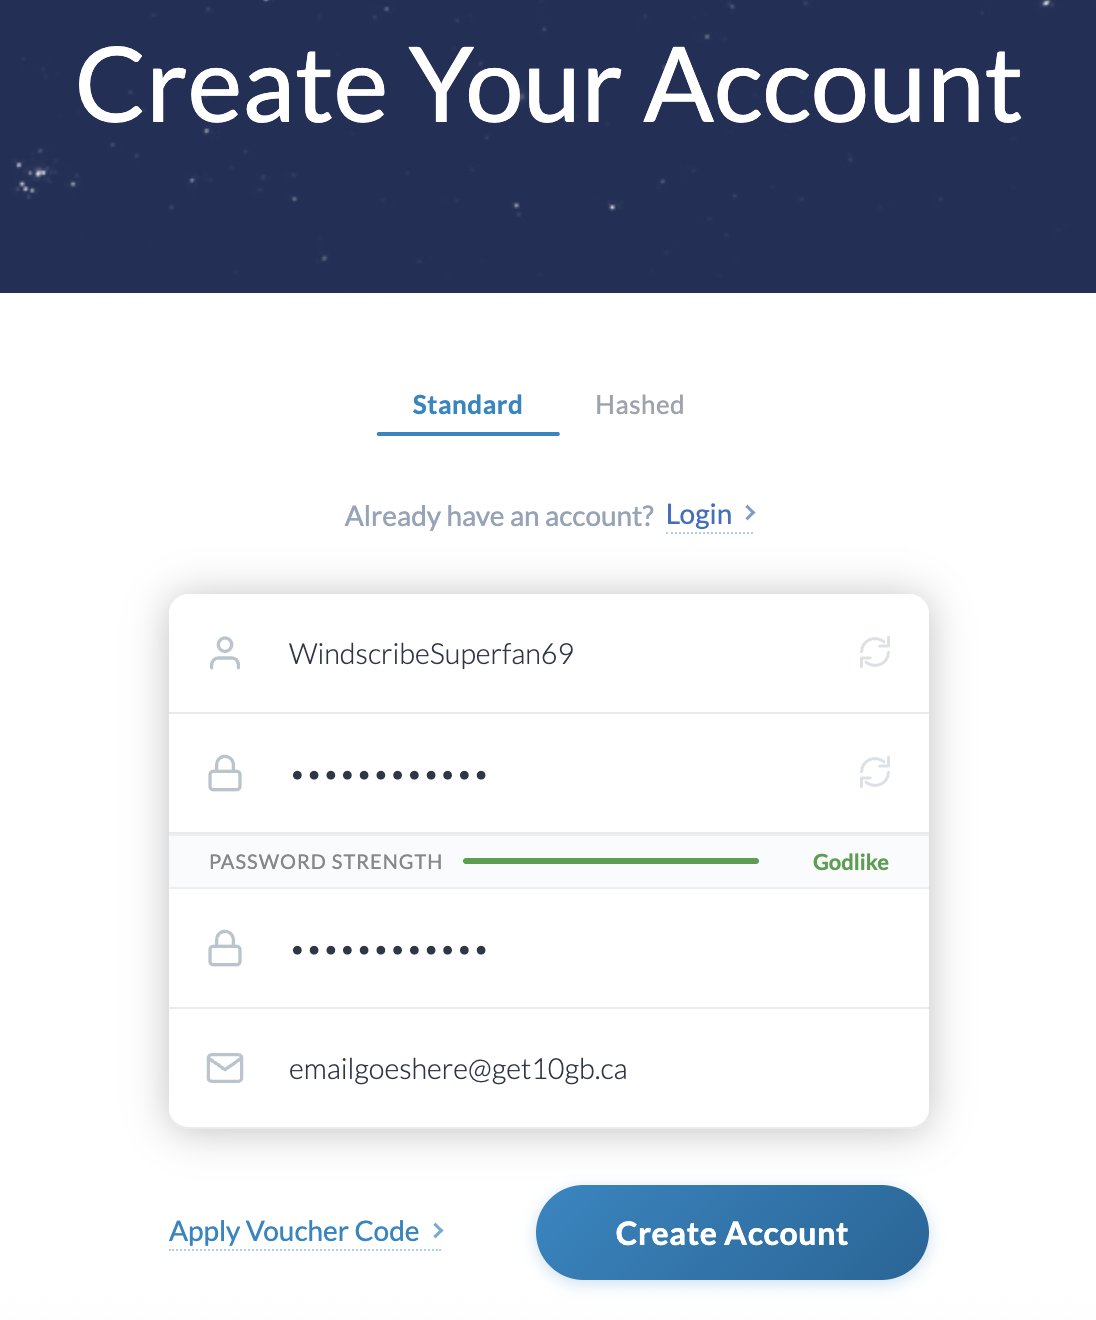
- First off, if you don't yet have a Windscribe account, create one on our website here, it takes less than a minute: https://windscribe.com/signup
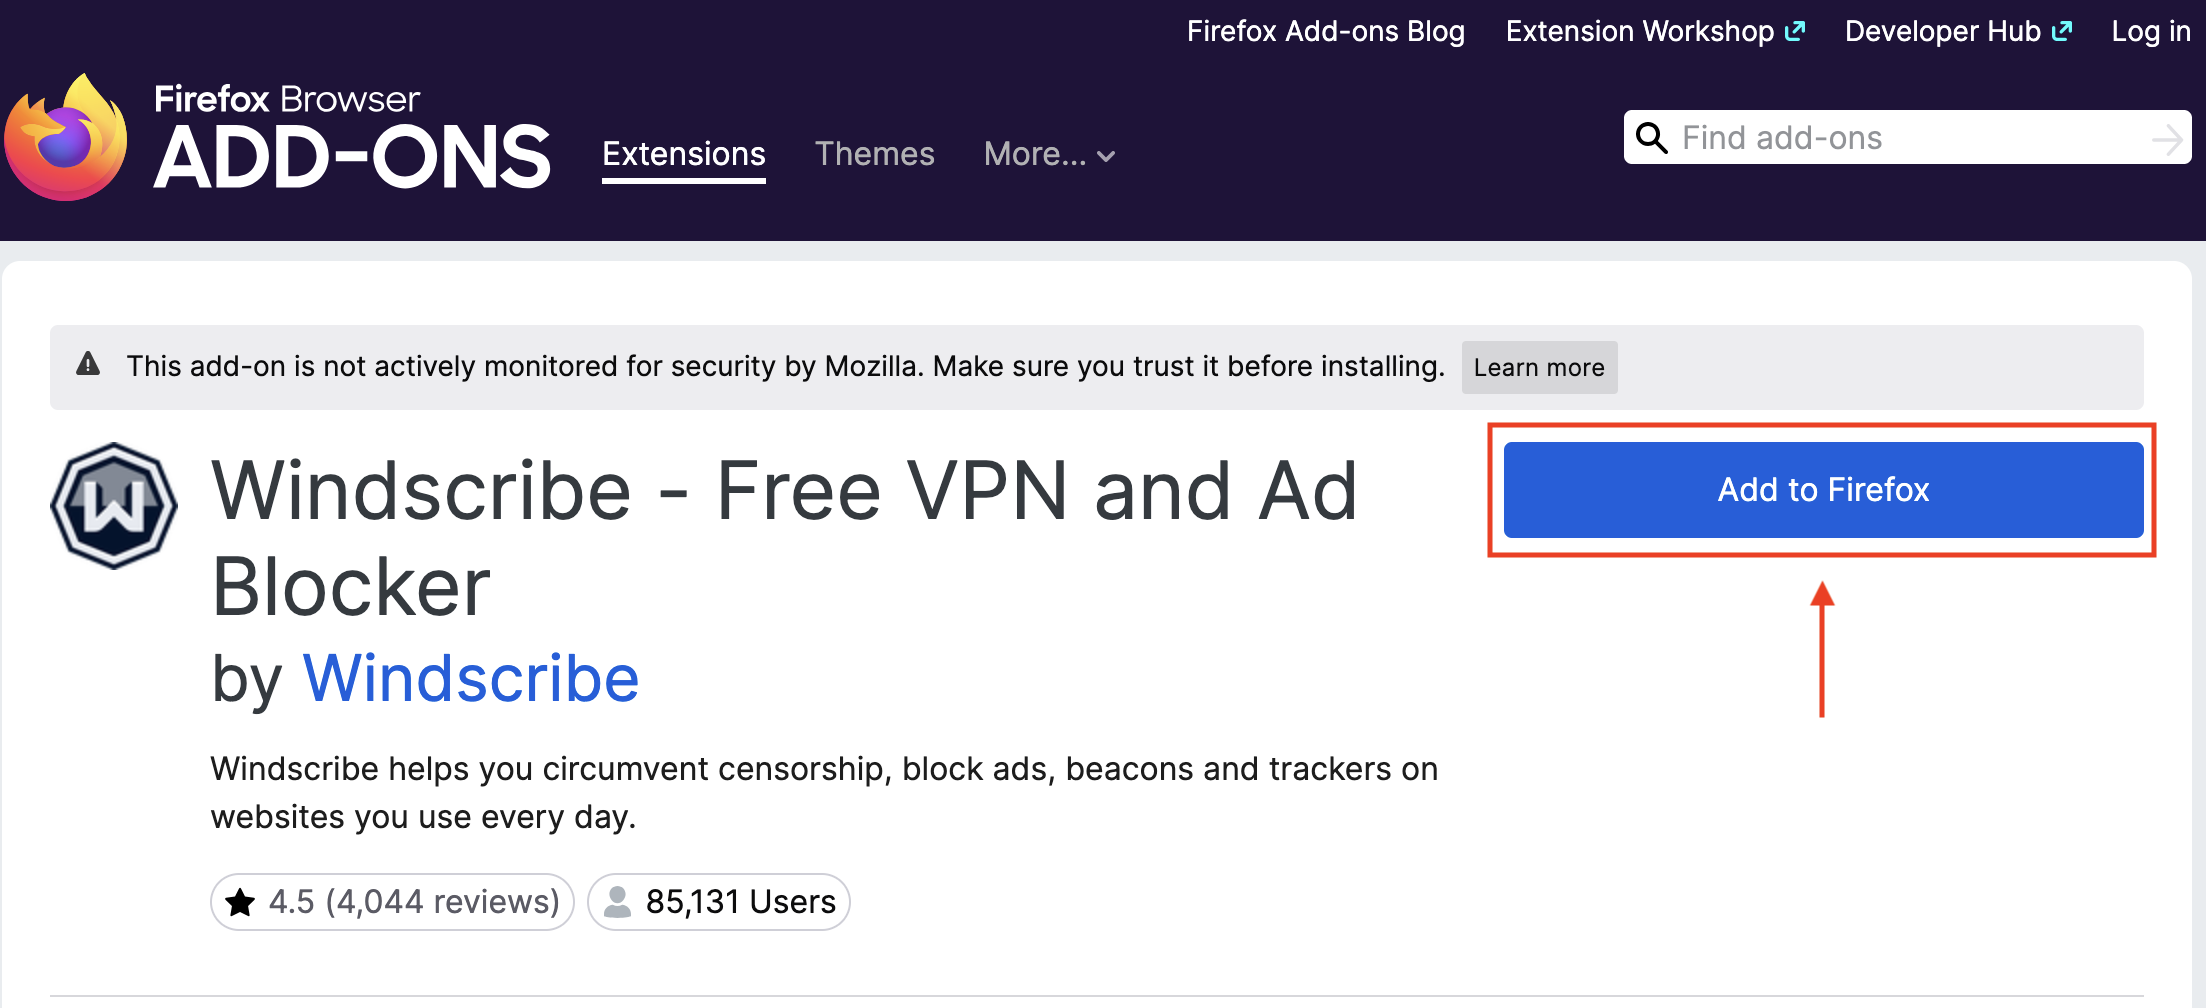
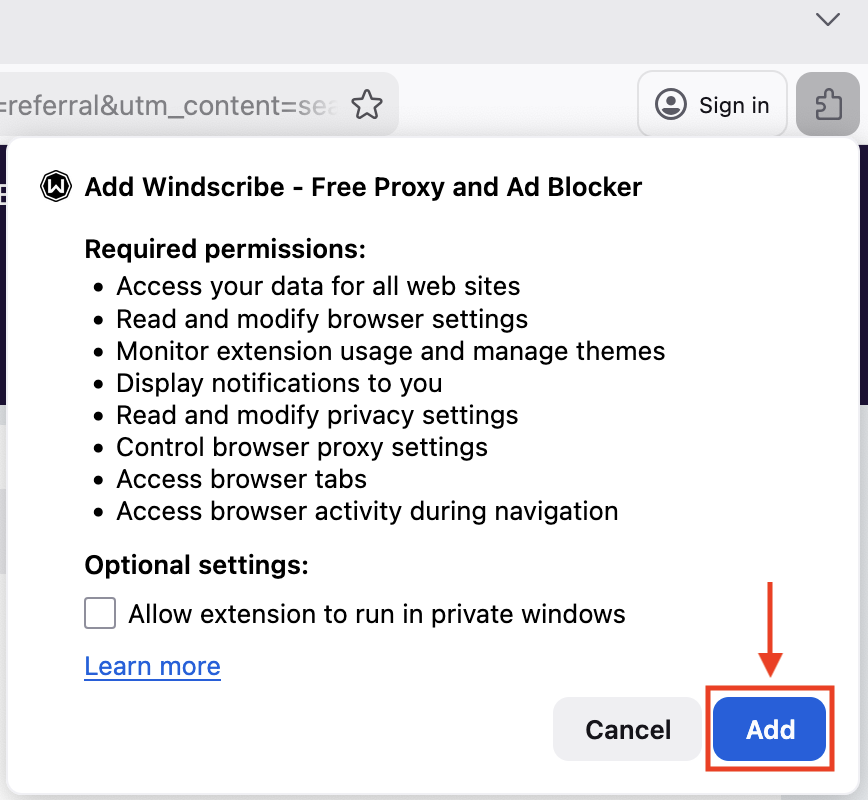
- Then once you have a Windscribe account, head to the Firefox Add-on store and install the Windscribe add-on: https://addons.mozilla.org/en-CA/firefox/addon/windscribe/
- Once installed, open the add-on by clicking the Windscribe icon in the top-right corner of your browser:

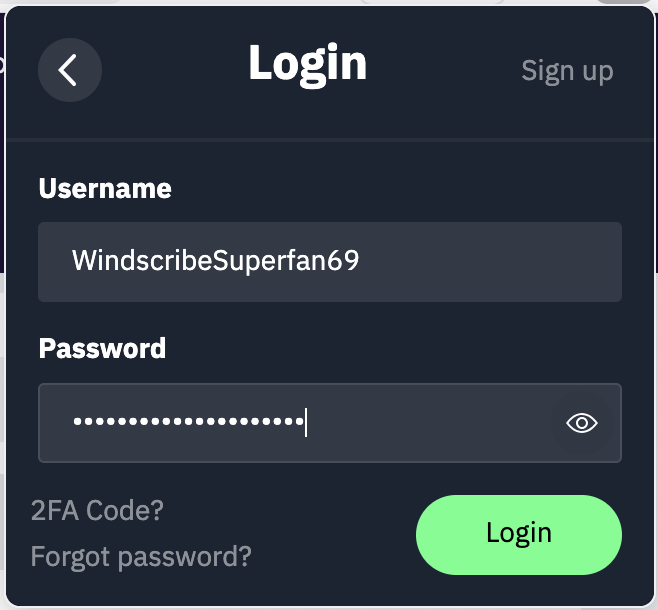
- Once it's open, log in with your Windscribe credentials and you're pretty much ready to go.

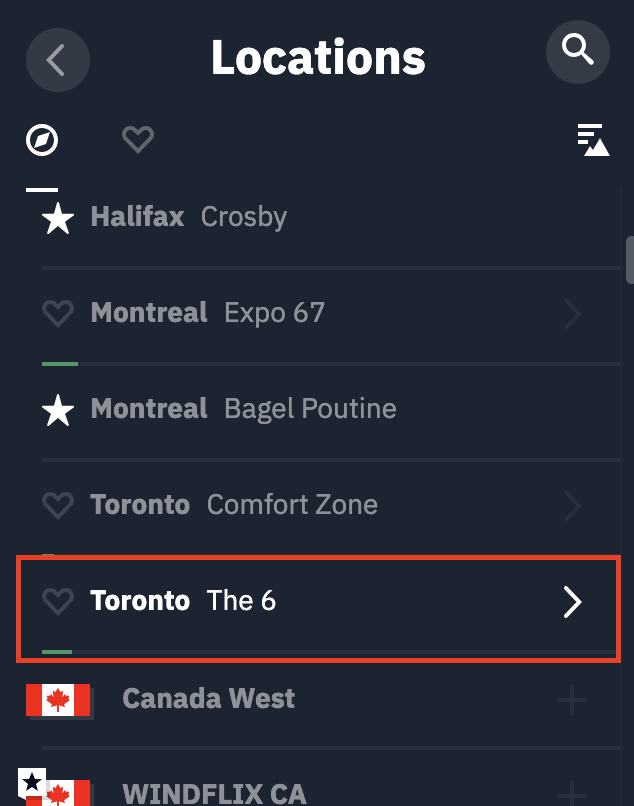
- Once logged in, you can connect to the Windscribe servers. Either press the big ON button on the right to connect (we'll choose the location for you if you are in Autopilot mode) or select the globe which will give you a list of locations you can choose to connect to. Locations with a star on the left are for paid users, you can get access to those by upgrading

- And that's it! You are now connected. When the add-on is connected, you will see ON in the top-left corner and the add-on will turn blue. The IP address will also change to the new VPN IP.
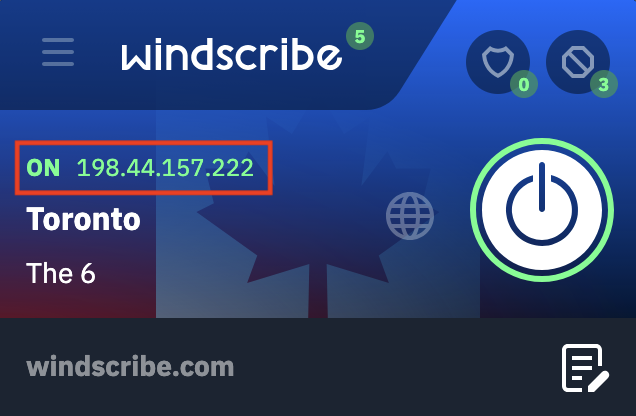
Once you are connected, all your internet traffic in this browser will go through the Windscribe servers. The websites you use will see the Windscribe IP shown in the add-on instead of your own personal IP address.
- You can disconnect from Windscribe by pressing the big ON/OFF button on the right.

Using the Double Hop Feature
Did you know you can proxy your connection through multiple Windscribe VPN locations? This is done using our Double Hop feature, where you connect to one location in the Windscribe desktop app, and another location in the browser extension. Then all your traffic in the browser will go through both!
To learn about more benefits of using our desktop app and the extension together, check out this video:
